How to Use GitHub Actions for CI/CD and Push to Google Artifact Registry
Introduction
In this guide, we will explore how to set up a CI/CD workflow using GitHub Actions to automate the build and deployment process and push artifacts to Google Artifact Registry. We will cover the following topics:
- Configuring the workflow
- Integrating GitHub Actions with Google Cloud
- Securely managing authentication
By following this guide, you will be able to streamline your development workflow and improve deployment consistency.
Prerequisites
Before we begin, ensure that you have the following prerequisites:
- A GitHub account
- A Google Cloud account
- A Google Cloud project
- A Google Cloud Artifact Registry repository
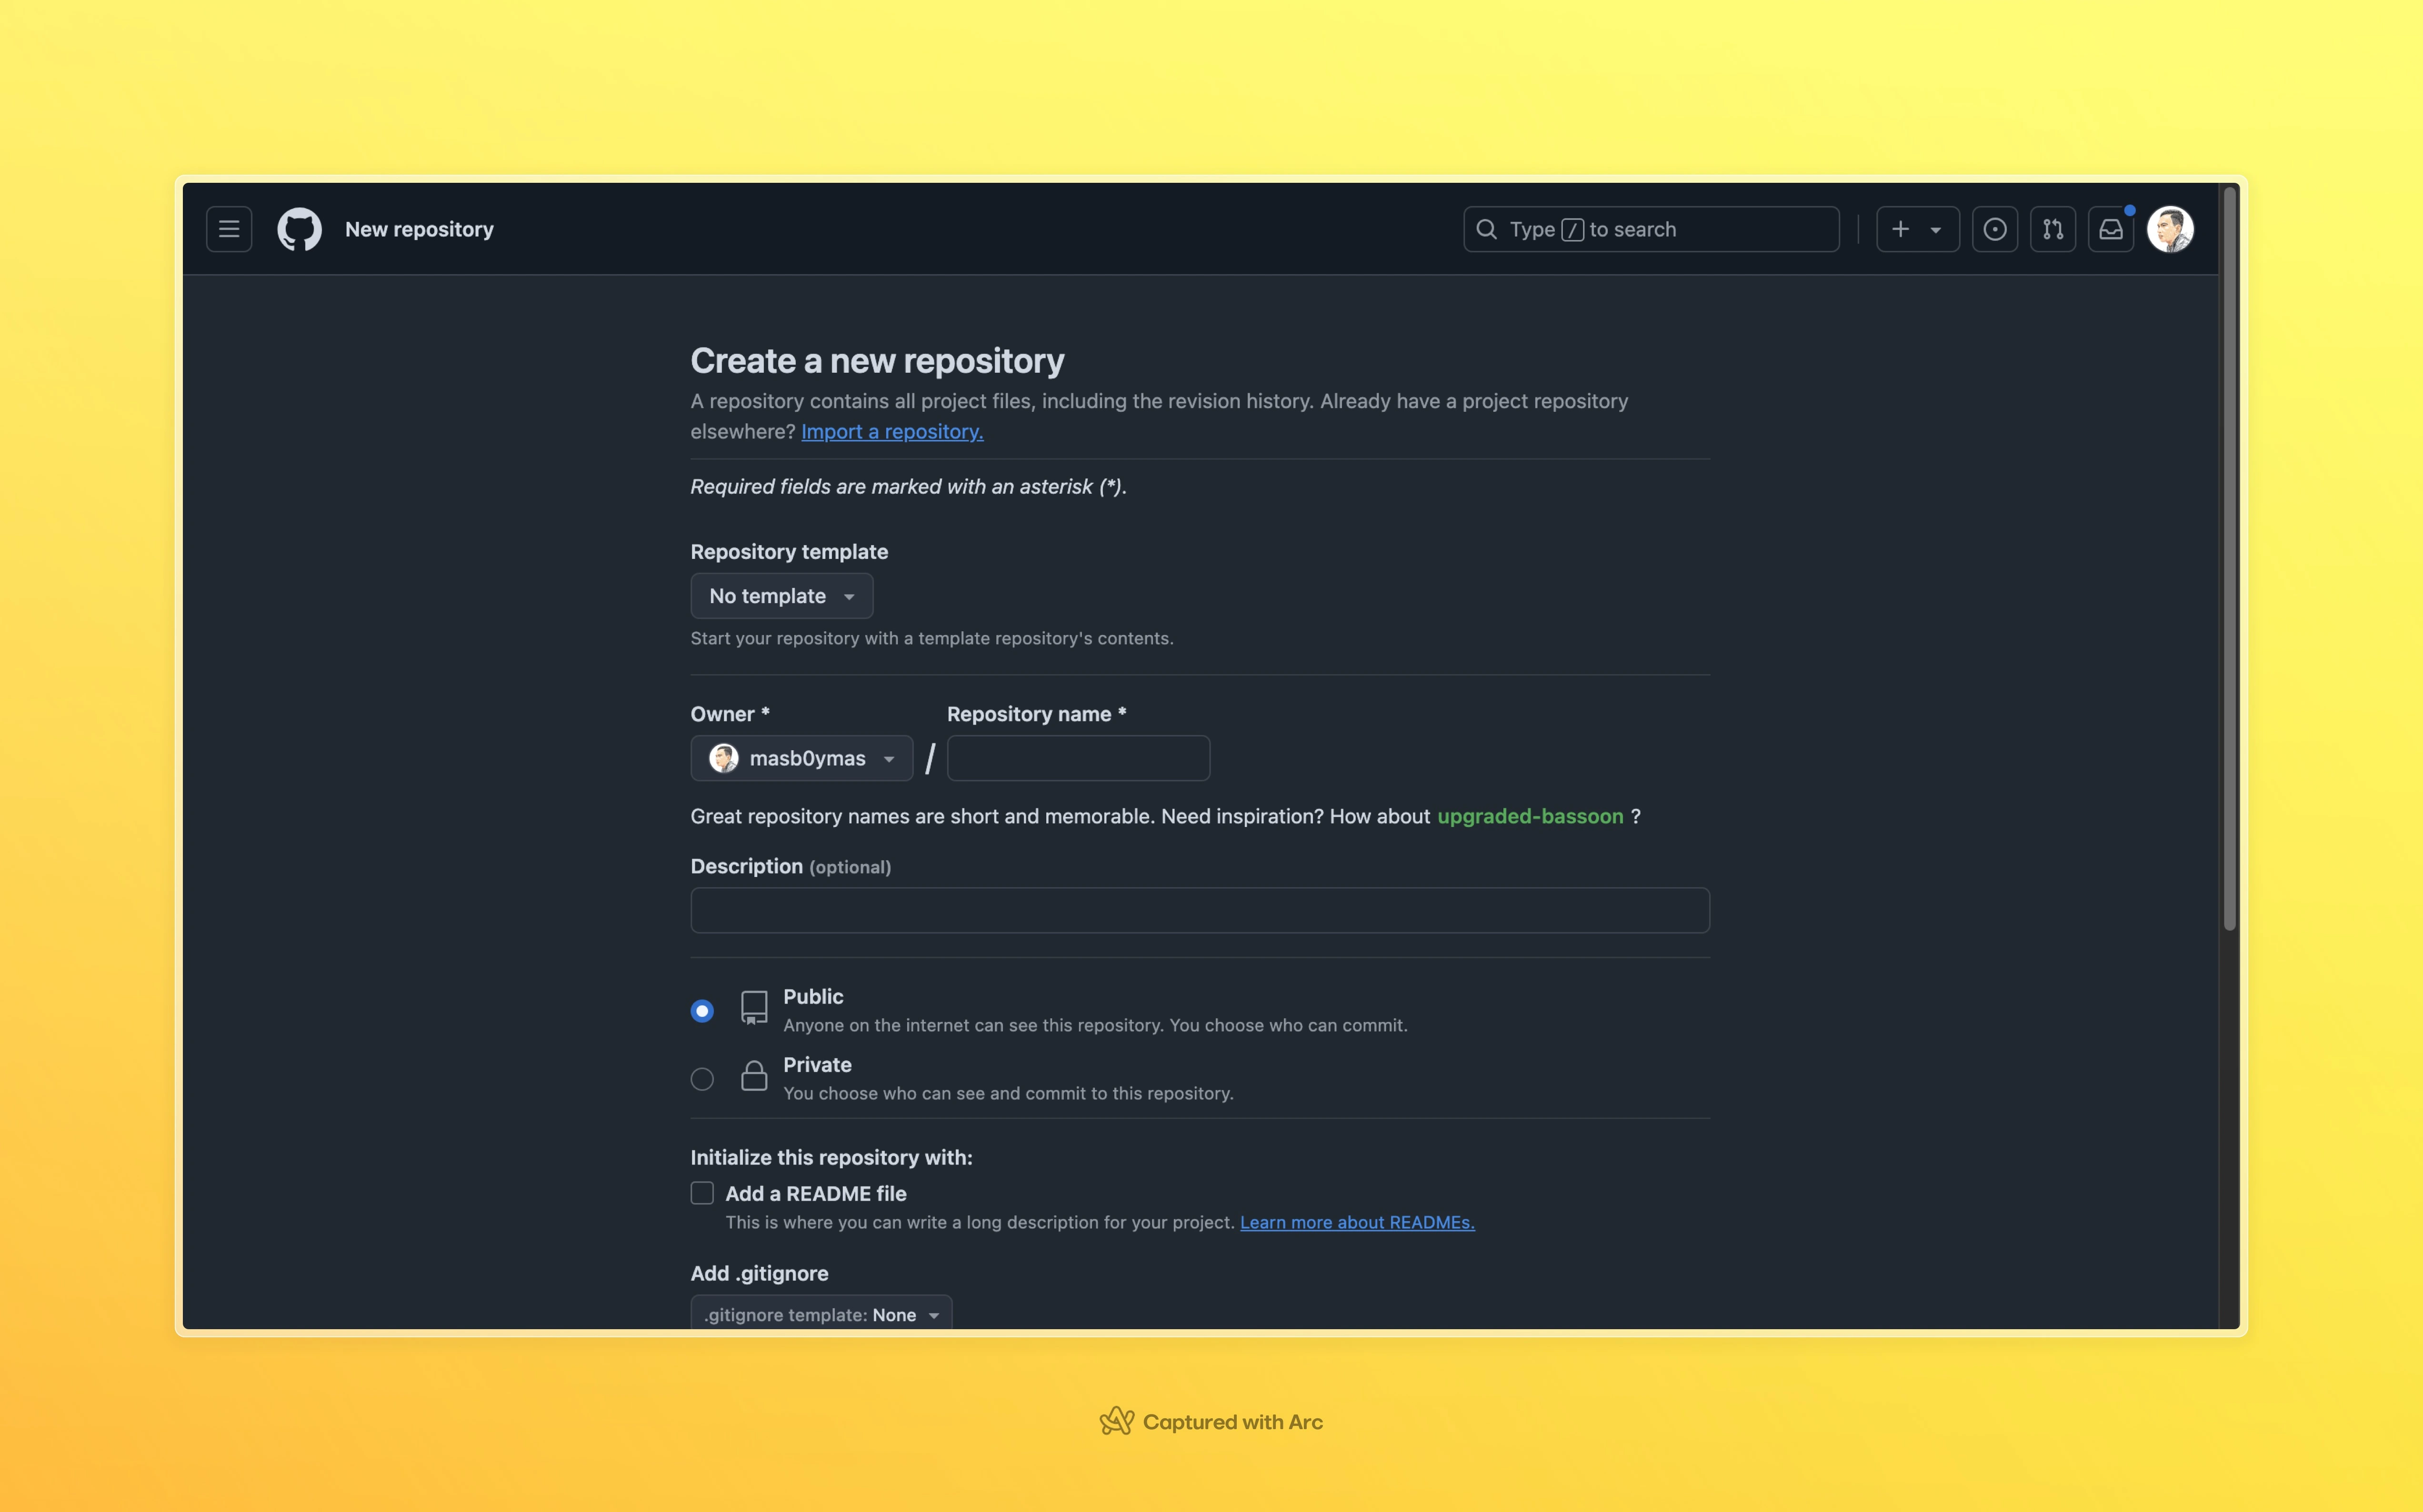
Step 1: Create a GitHub repository
First, create a new GitHub repository for your project. You can do this by navigating to the GitHub website and clicking on the "New repository" button. Follow the prompts to create a new repository with the desired name and description.
Step 2: Create a Google Cloud project
Next, create a new Google Cloud project. You can do this by navigating to the Google Cloud console and clicking on the "Create project" button. Follow the prompts to create a new project with the desired name and region.
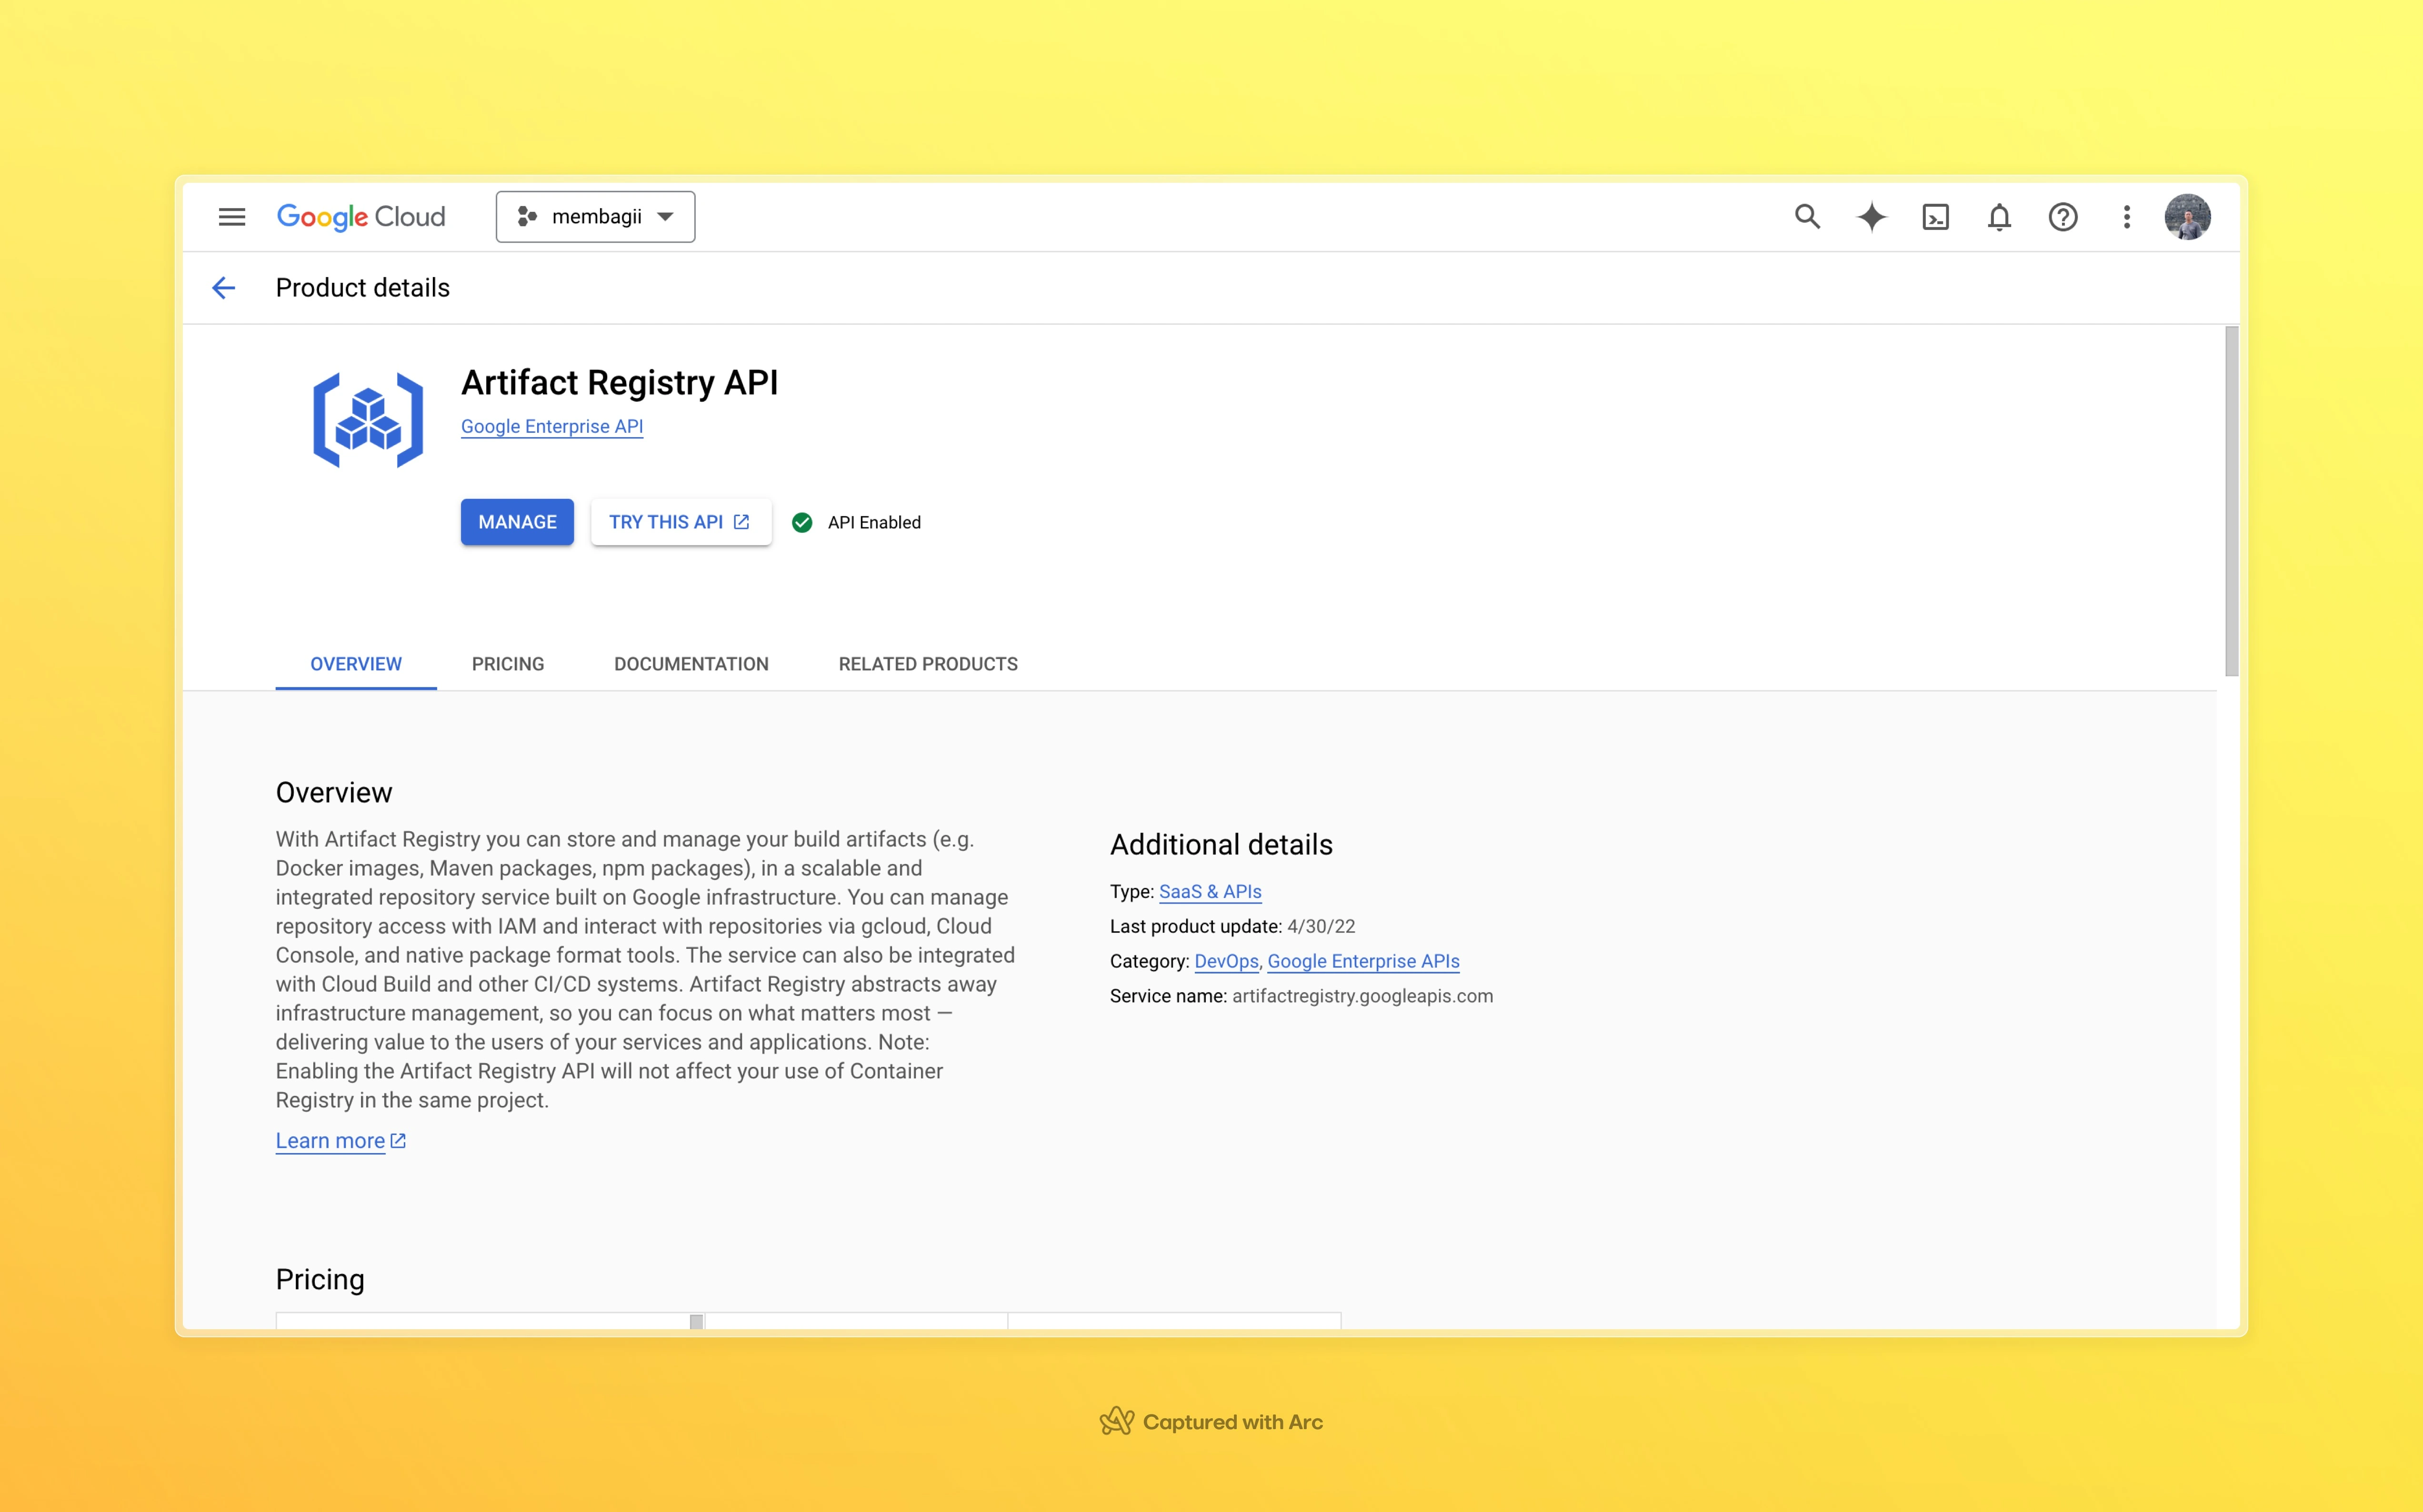
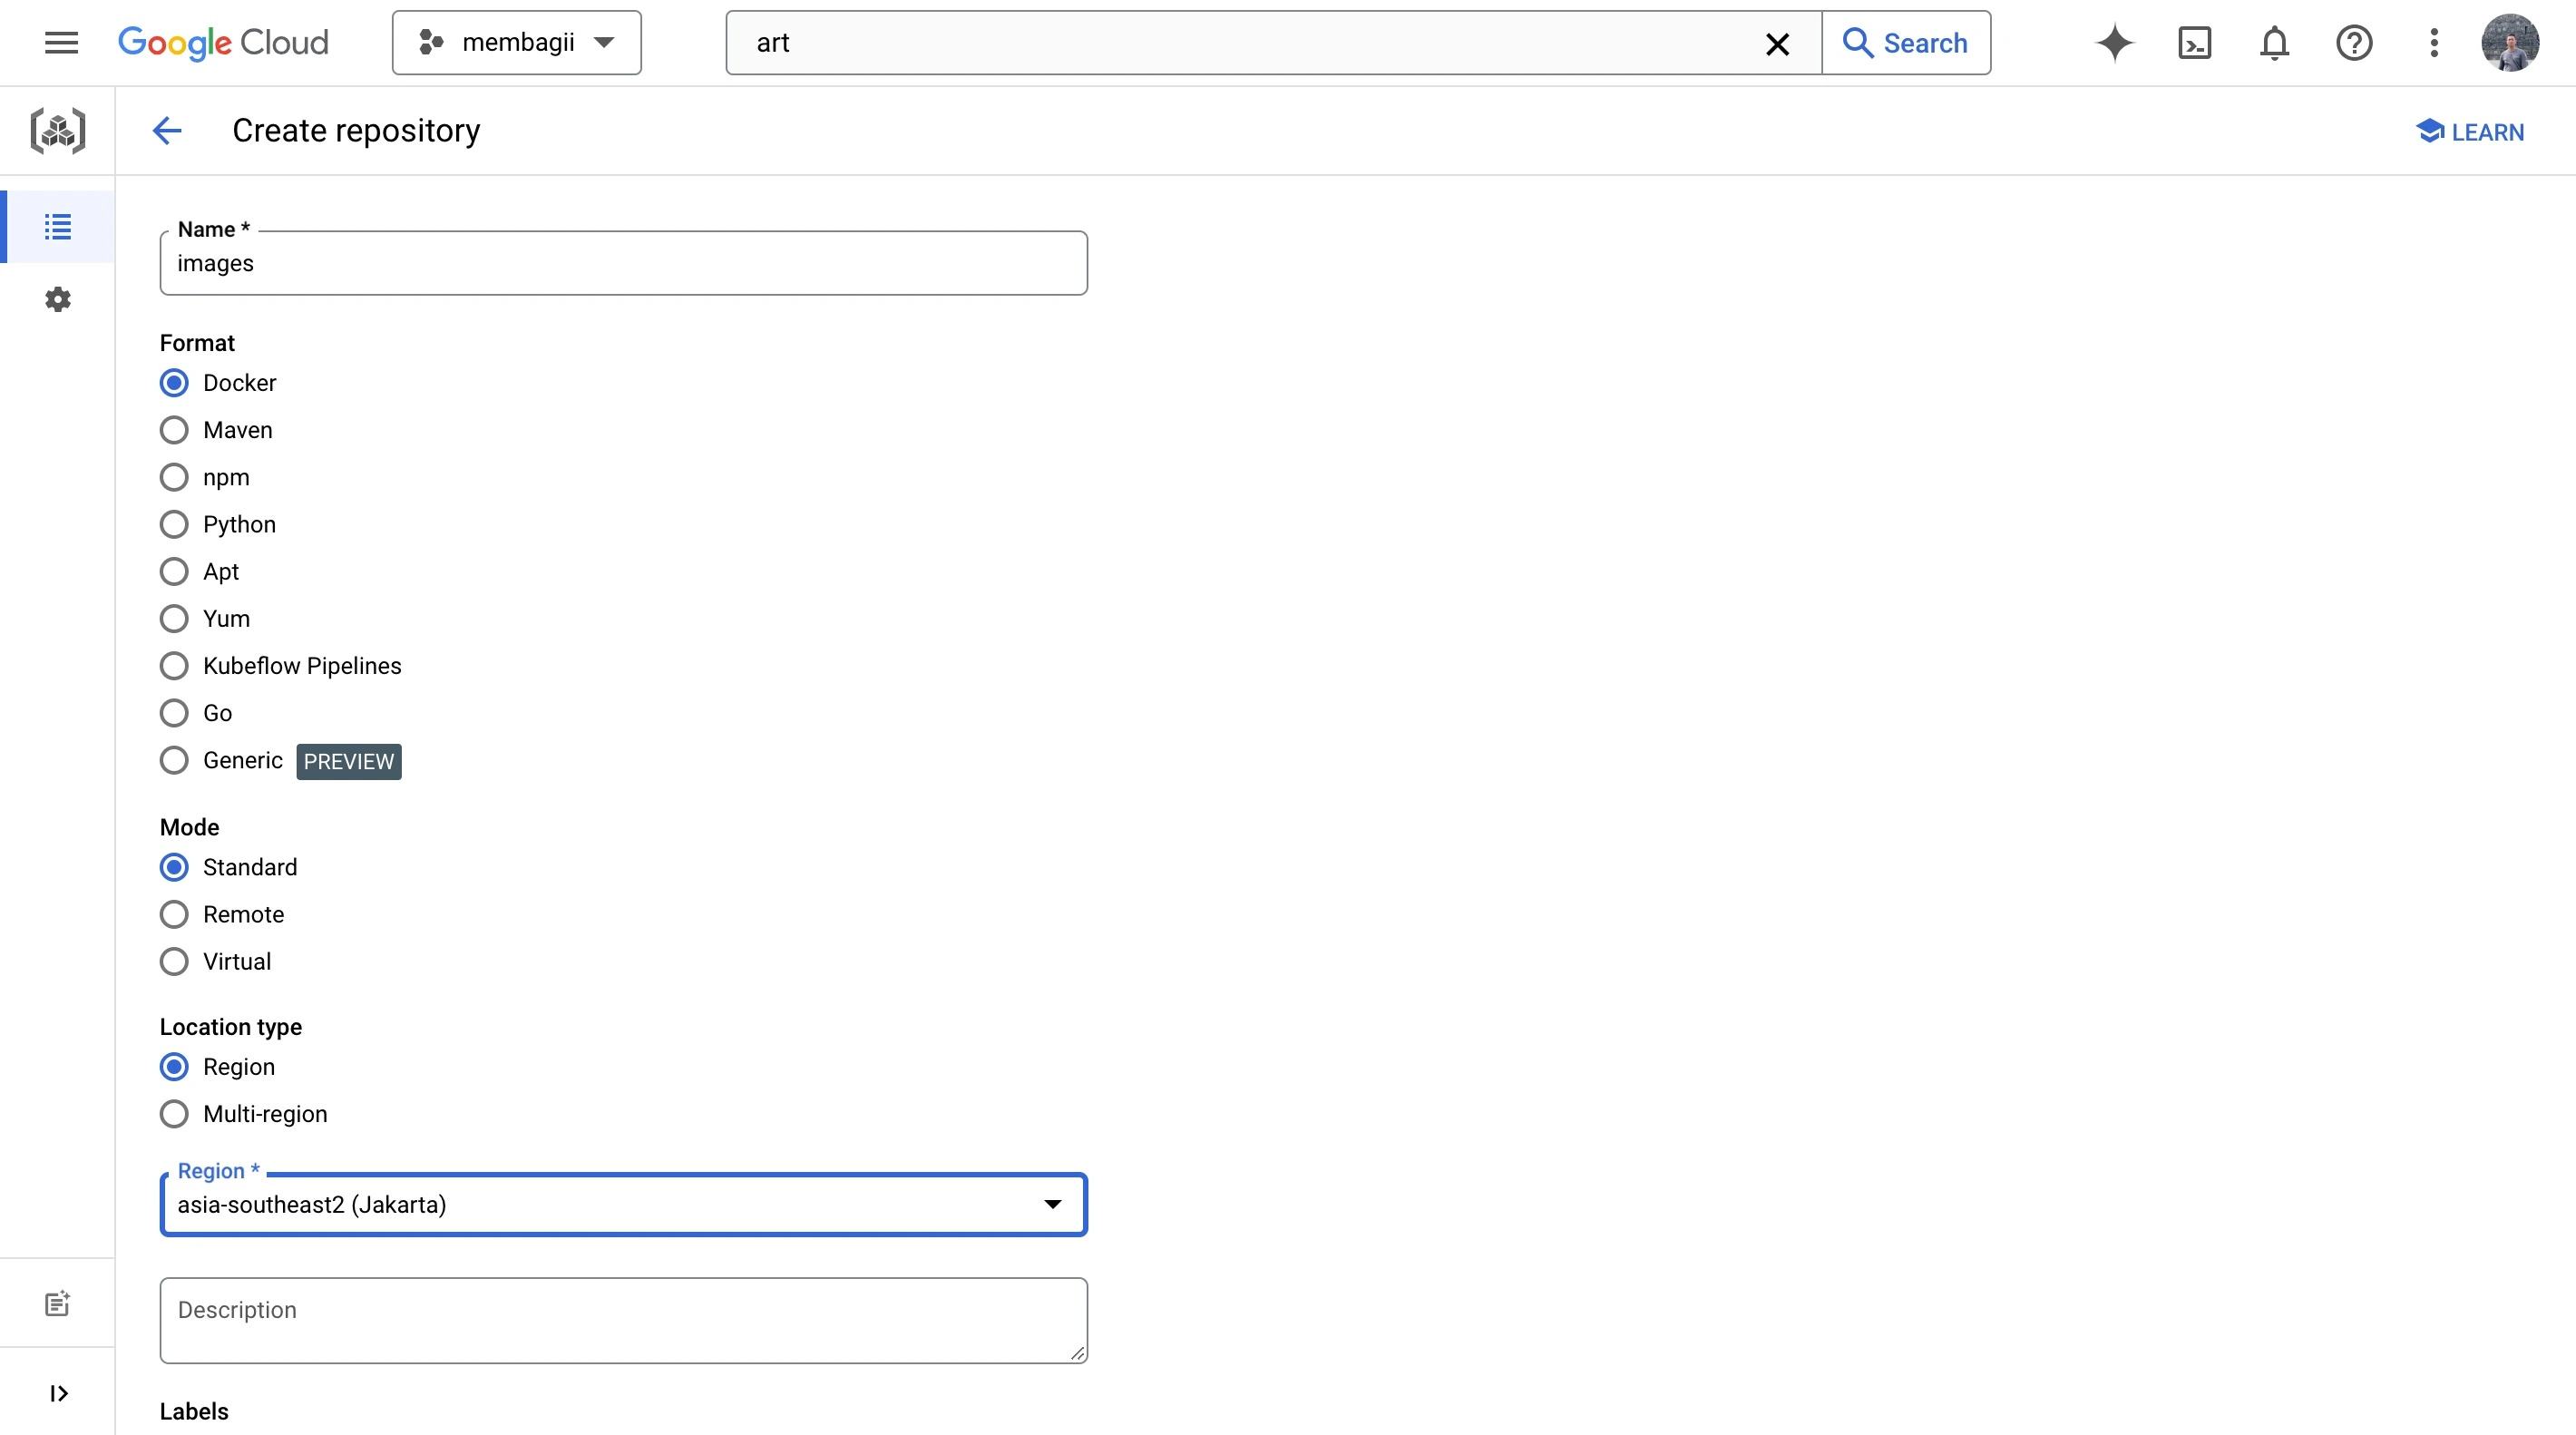
Step 3: Create a Google Cloud Artifact Registry repository
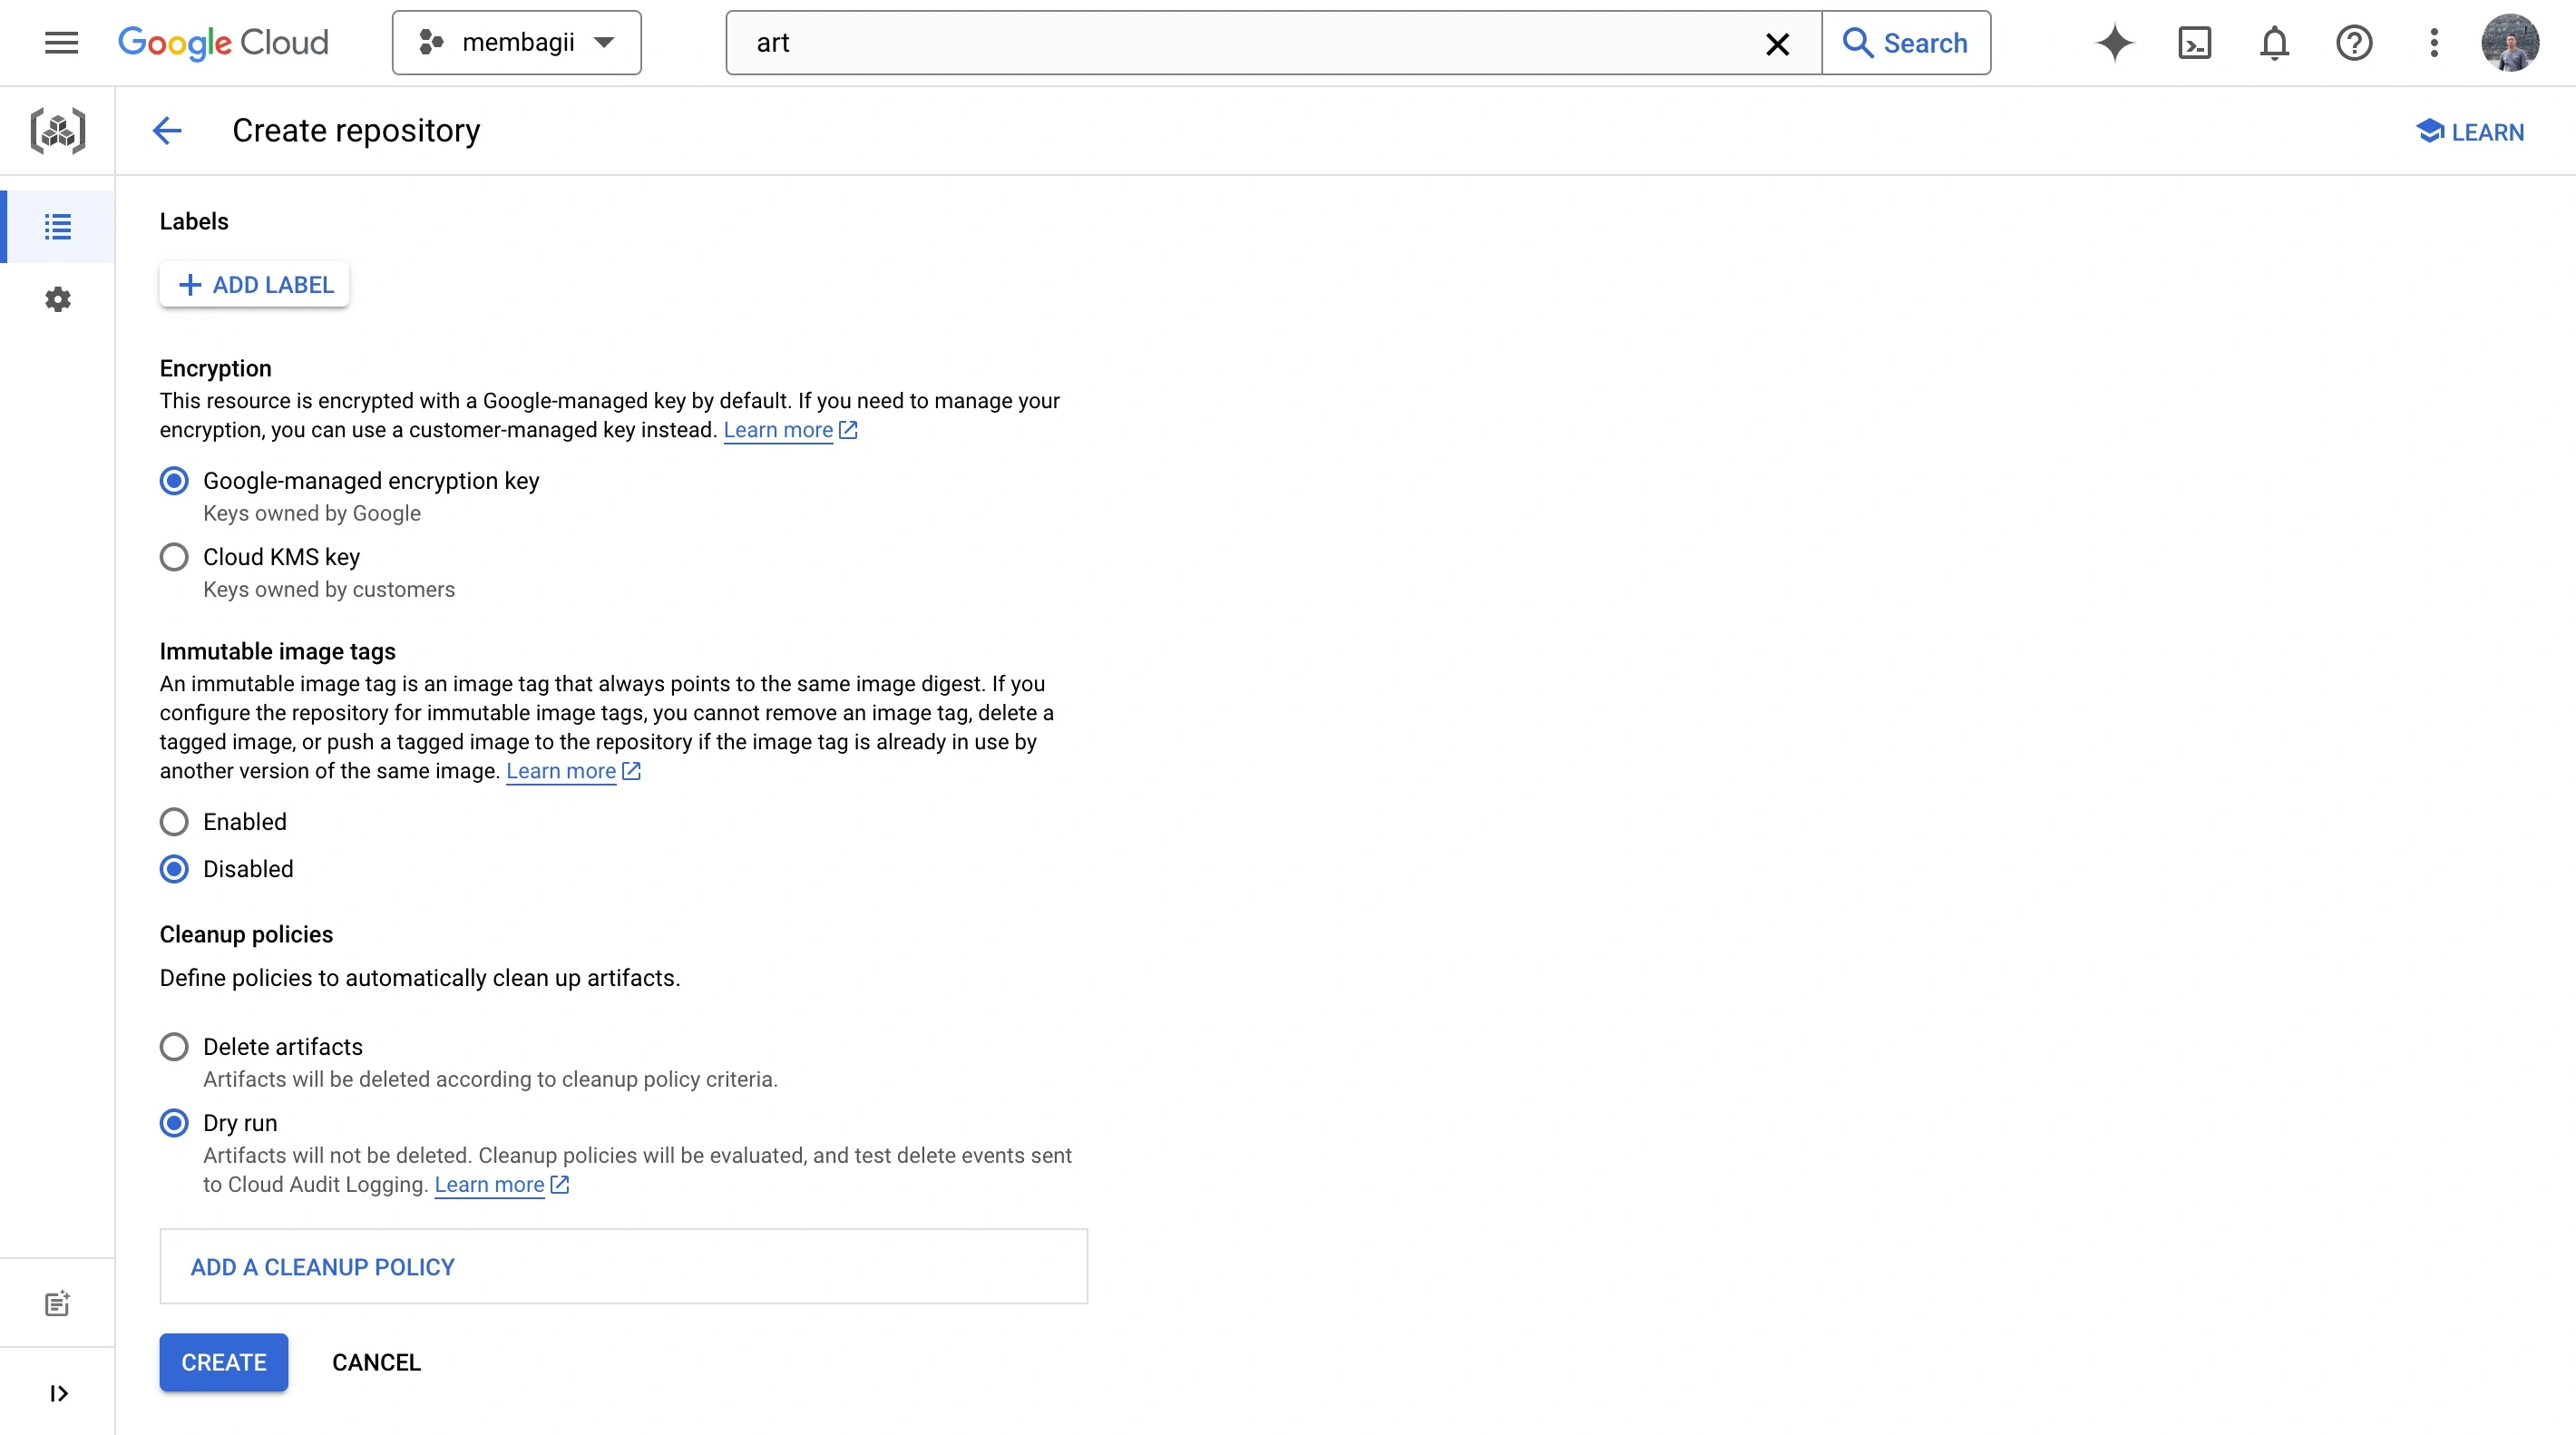
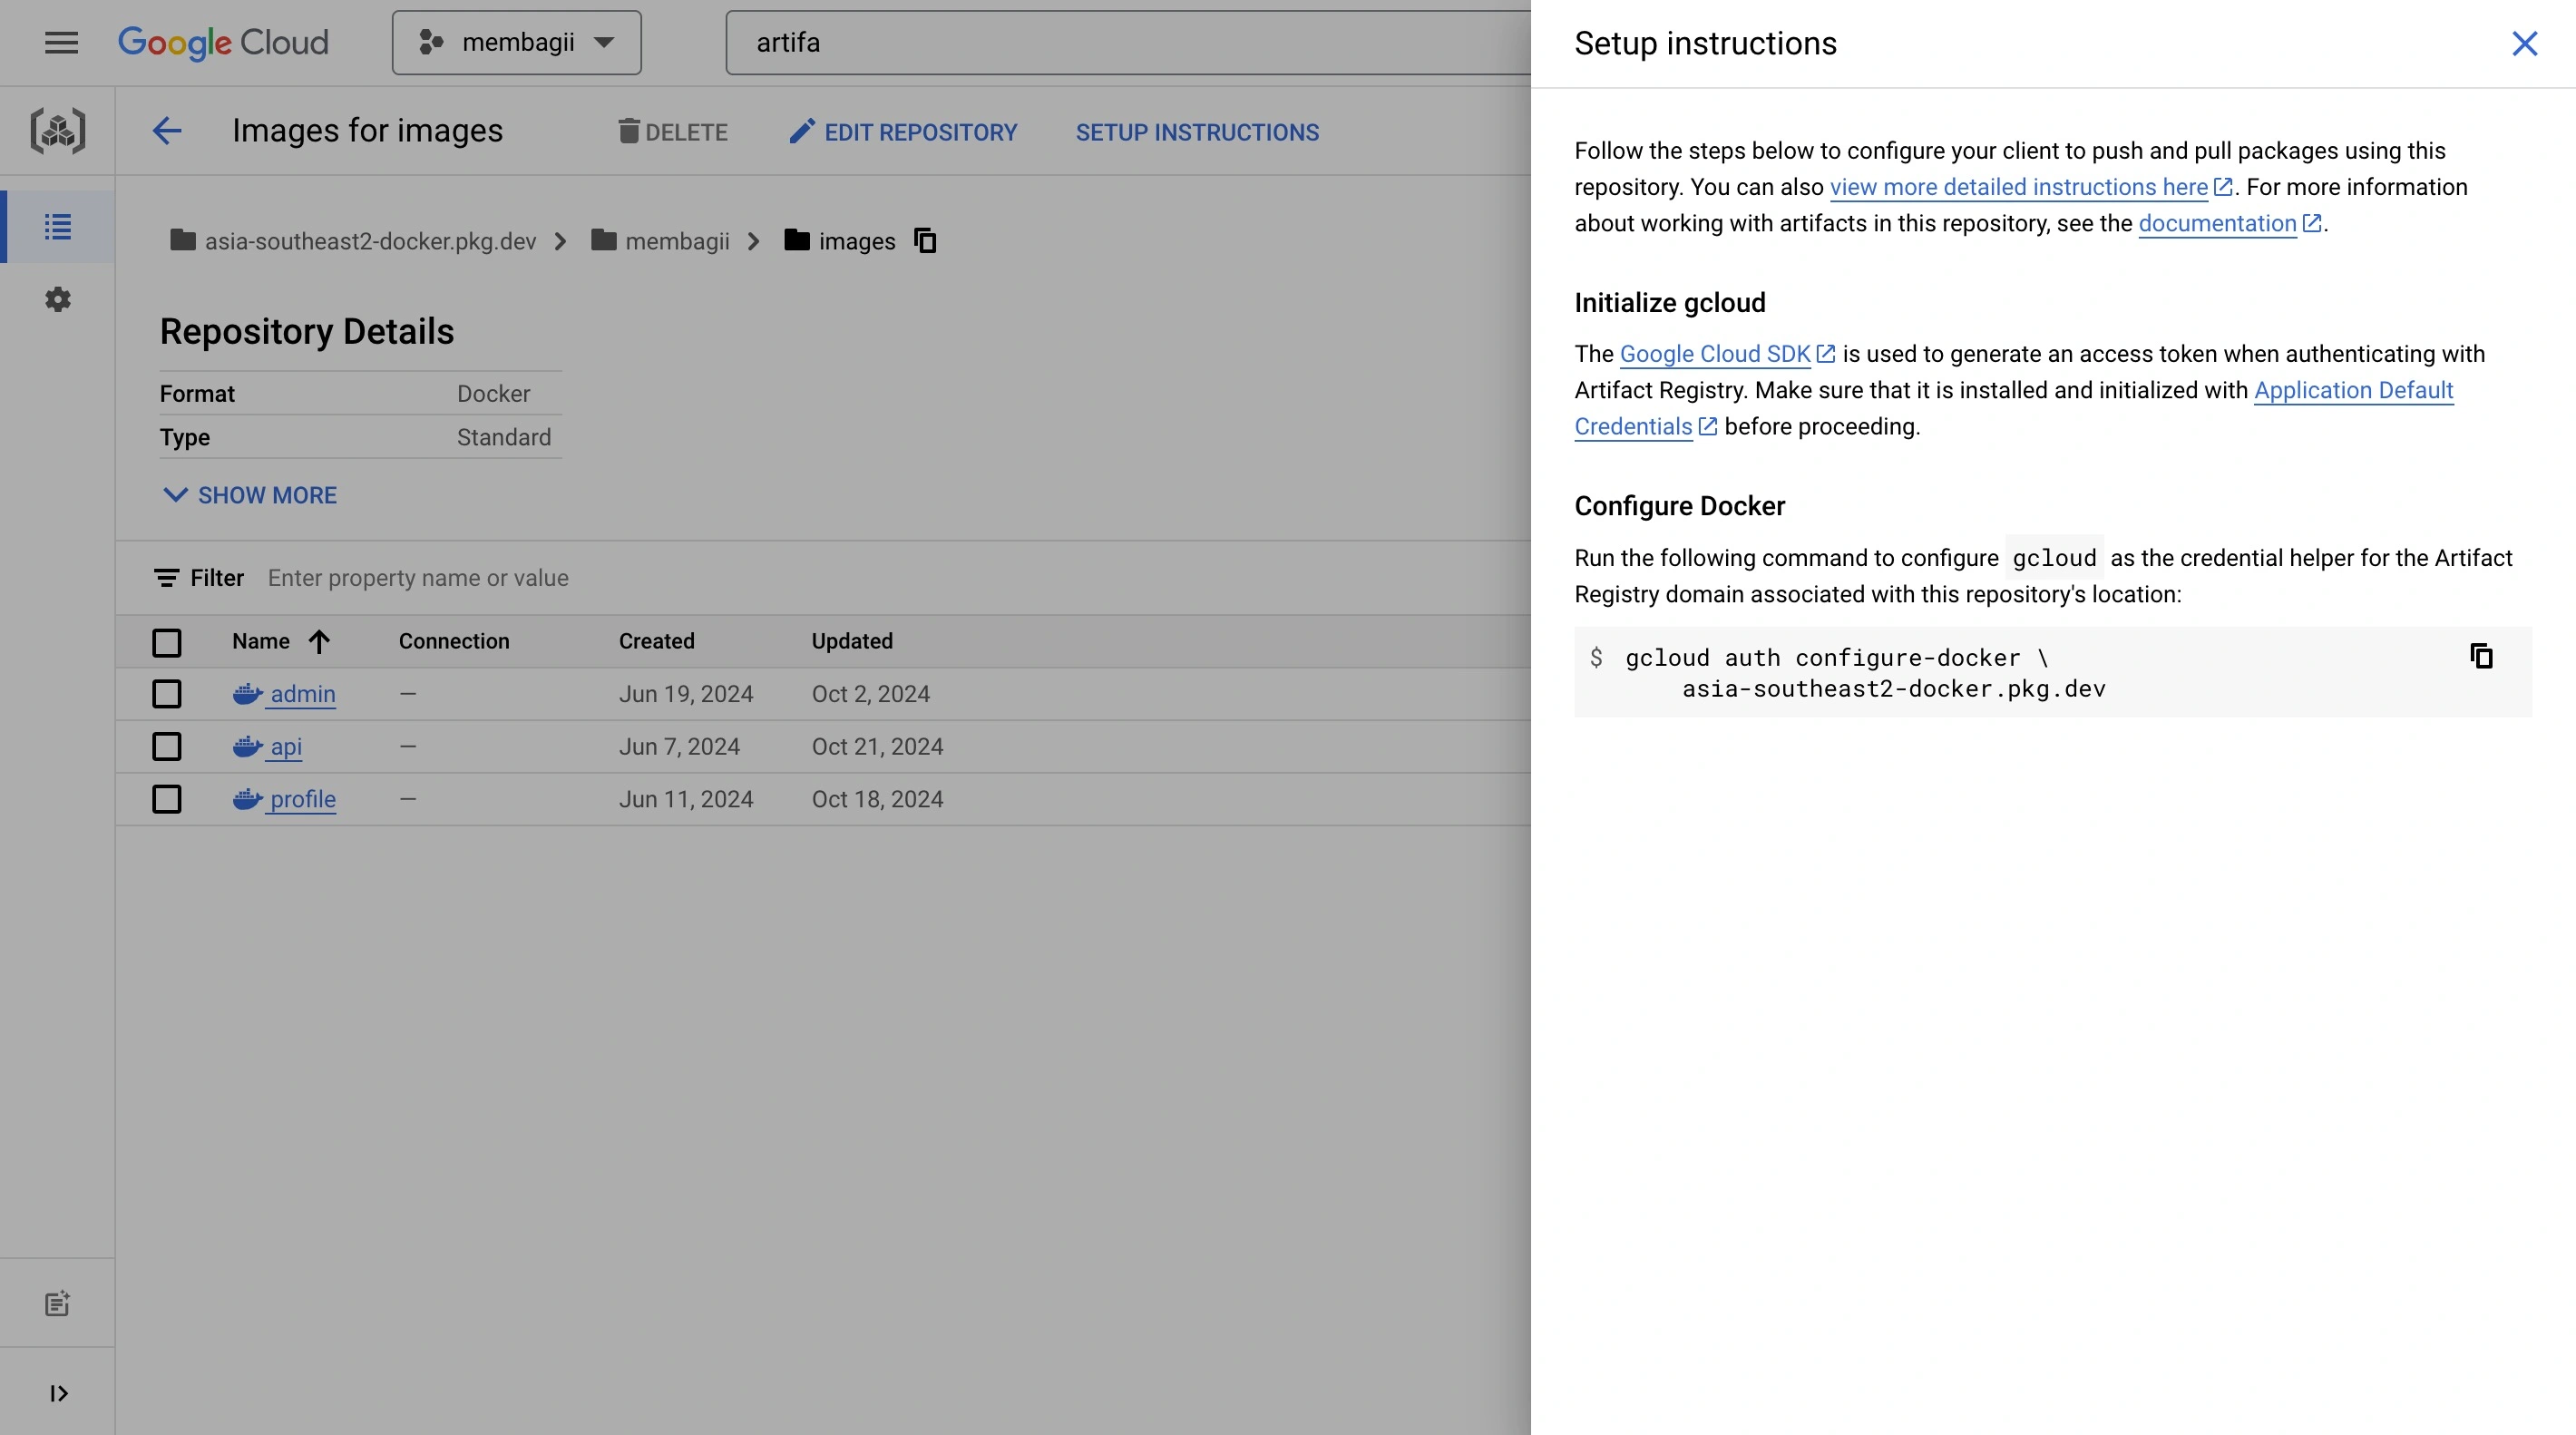
After creating a new Google Cloud project, you will need to create a new Artifact Registry repository. You can do this by navigating to the Artifact Registry section of the Google Cloud console and clicking on the "Create repository" button. Follow the prompts to create a new repository with the desired name and description.
Step 4: Configure the workflow
Now that we have our repository and Artifact Registry repository set up, we can configure the workflow. We will use the following steps to configure the workflow:
- Create a new file named
.github/workflows/build.ymlin the root of your repository. - Add the following code to the file:
name: Build and deploy
on:
push:
tags:
- "*"
jobs:
build:
runs-on: ubuntu-latest
env:
IMAGE_NAME: api # your image name
PROJECT_ID: membagii # your project id
ARTIFACT_REGION: asia-southeast2-docker.pkg.dev # Artifact Registry Region
steps:
- name: Checkout code
uses: actions/checkout@v3
- name: Github Tag Release Version # set release version from tag name
id: latestTag
run: |-
echo "Tag name from GITHUB_REF_NAME: $GITHUB_REF_NAME"
echo "RELEASE_VERSION=release-${{ github.ref_name }}" >> $GITHUB_ENV
      - name: Google Cloud Platform Auth
        uses: "google-github-actions/auth@v1"
        with:
          credentials_json: "${{ secrets.SERVICE_ACCOUNT_KEY }}"

      - name: "Set up Cloud SDK"
        uses: google-github-actions/setup-gcloud@v1
- name: Build Docker Image
run: |-
docker build -t ${{ env.IMAGE_NAME }}:latest .
- name: Configure Docker Client
run: |-
gcloud auth configure-docker --quiet
gcloud auth configure-docker ${{ env.ARTIFACT_REGION }} --quiet
- name: Push Docker Image to Artifact Registry
run: |-
docker tag ${{ env.IMAGE_NAME }}:latest ${{ env.ARTIFACT_REGION }}/${{ env.PROJECT_ID }}/images/${{ env.IMAGE_NAME }}:latest
docker tag ${{ env.IMAGE_NAME }}:latest ${{ env.ARTIFACT_REGION }}/${{ env.PROJECT_ID }}/images/${{ env.IMAGE_NAME }}:release
docker tag ${{ env.IMAGE_NAME }}:latest ${{ env.ARTIFACT_REGION }}/${{ env.PROJECT_ID }}/images/${{ env.IMAGE_NAME }}:${{ env.RELEASE_VERSION }}
docker push ${{ env.ARTIFACT_REGION }}/${{ env.PROJECT_ID }}/images/${{ env.IMAGE_NAME }}:latest
docker push ${{ env.ARTIFACT_REGION }}/${{ env.PROJECT_ID }}/images/${{ env.IMAGE_NAME }}:release
docker push ${{ env.ARTIFACT_REGION }}/${{ env.PROJECT_ID }}/images/${{ env.IMAGE_NAME }}:${{ env.RELEASE_VERSION }}
- name: Call Webhook # optional
uses: joelwmale/[email protected]
env:
IMAGE_REGISTRY: Google Cloud Artifact
IMAGE_REPOSITORY: ${{ env.ARTIFACT_REGION }}/${{ env.PROJECT_ID }}/images/${{ env.IMAGE_NAME }}
IMAGE_TAG: ${{ env.RELEASE_VERSION }}
with:
url: ${{ secrets.WEBHOOK_URL }}/api/v1/workflow-github?telegram_chat_id=${{ env.TELEGRAM_CHAT_ID }}&slack_channel=${{ env.SLACK_CHANNEL_ID }}®istry=${{ env.IMAGE_REGISTRY }}
body: '{"push_data":{"tag":"${{ env.IMAGE_TAG }}"},"repository":{"name":"${{ env.IMAGE_REPOSITORY }}"}}'
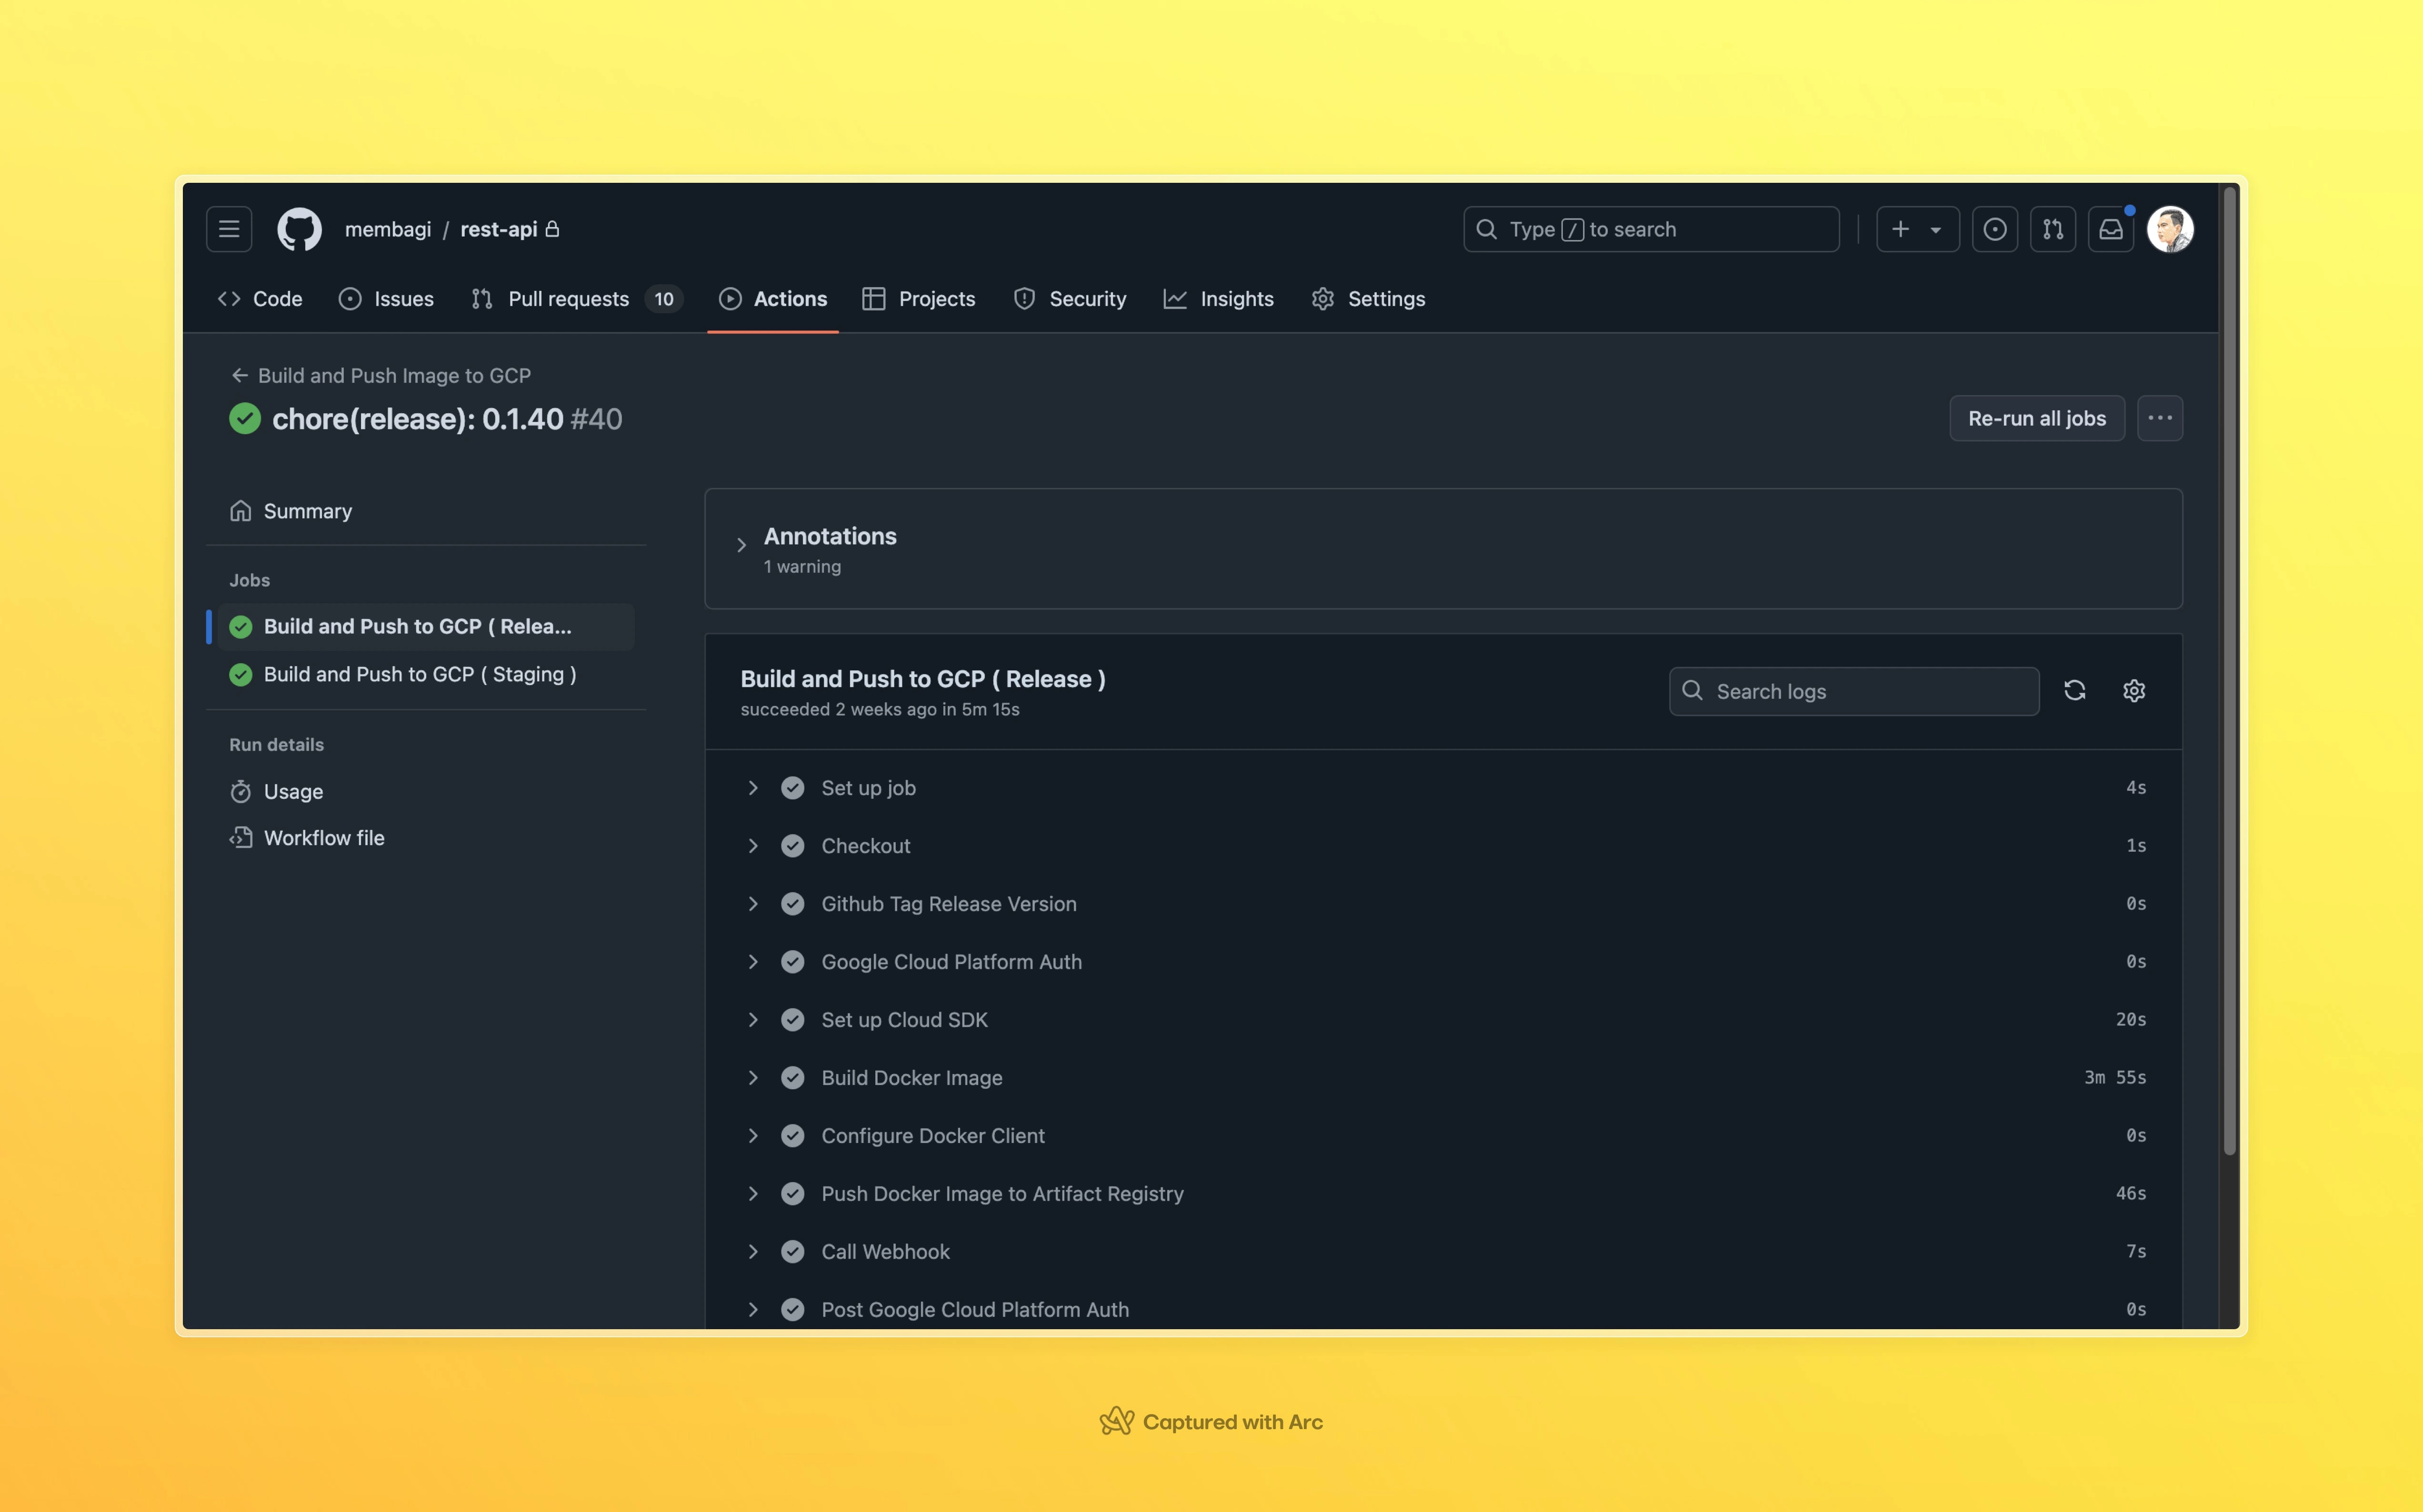
This workflow will be triggered whenever a push tagging version is made to the repository. It will first check out the code from the repository. Then, it will set up Docker, which is a tool for building and pushing Docker images. Next, it will log in to the Google Artifact Registry using the provided credentials. Finally, it will build and push the Docker image to the Artifact Registry.
Step 5: Integrate GitHub Actions with Google Cloud
To integrate GitHub Actions with Google Cloud, you will need to create a service account and generate a JSON key file. You can do this by following these steps:
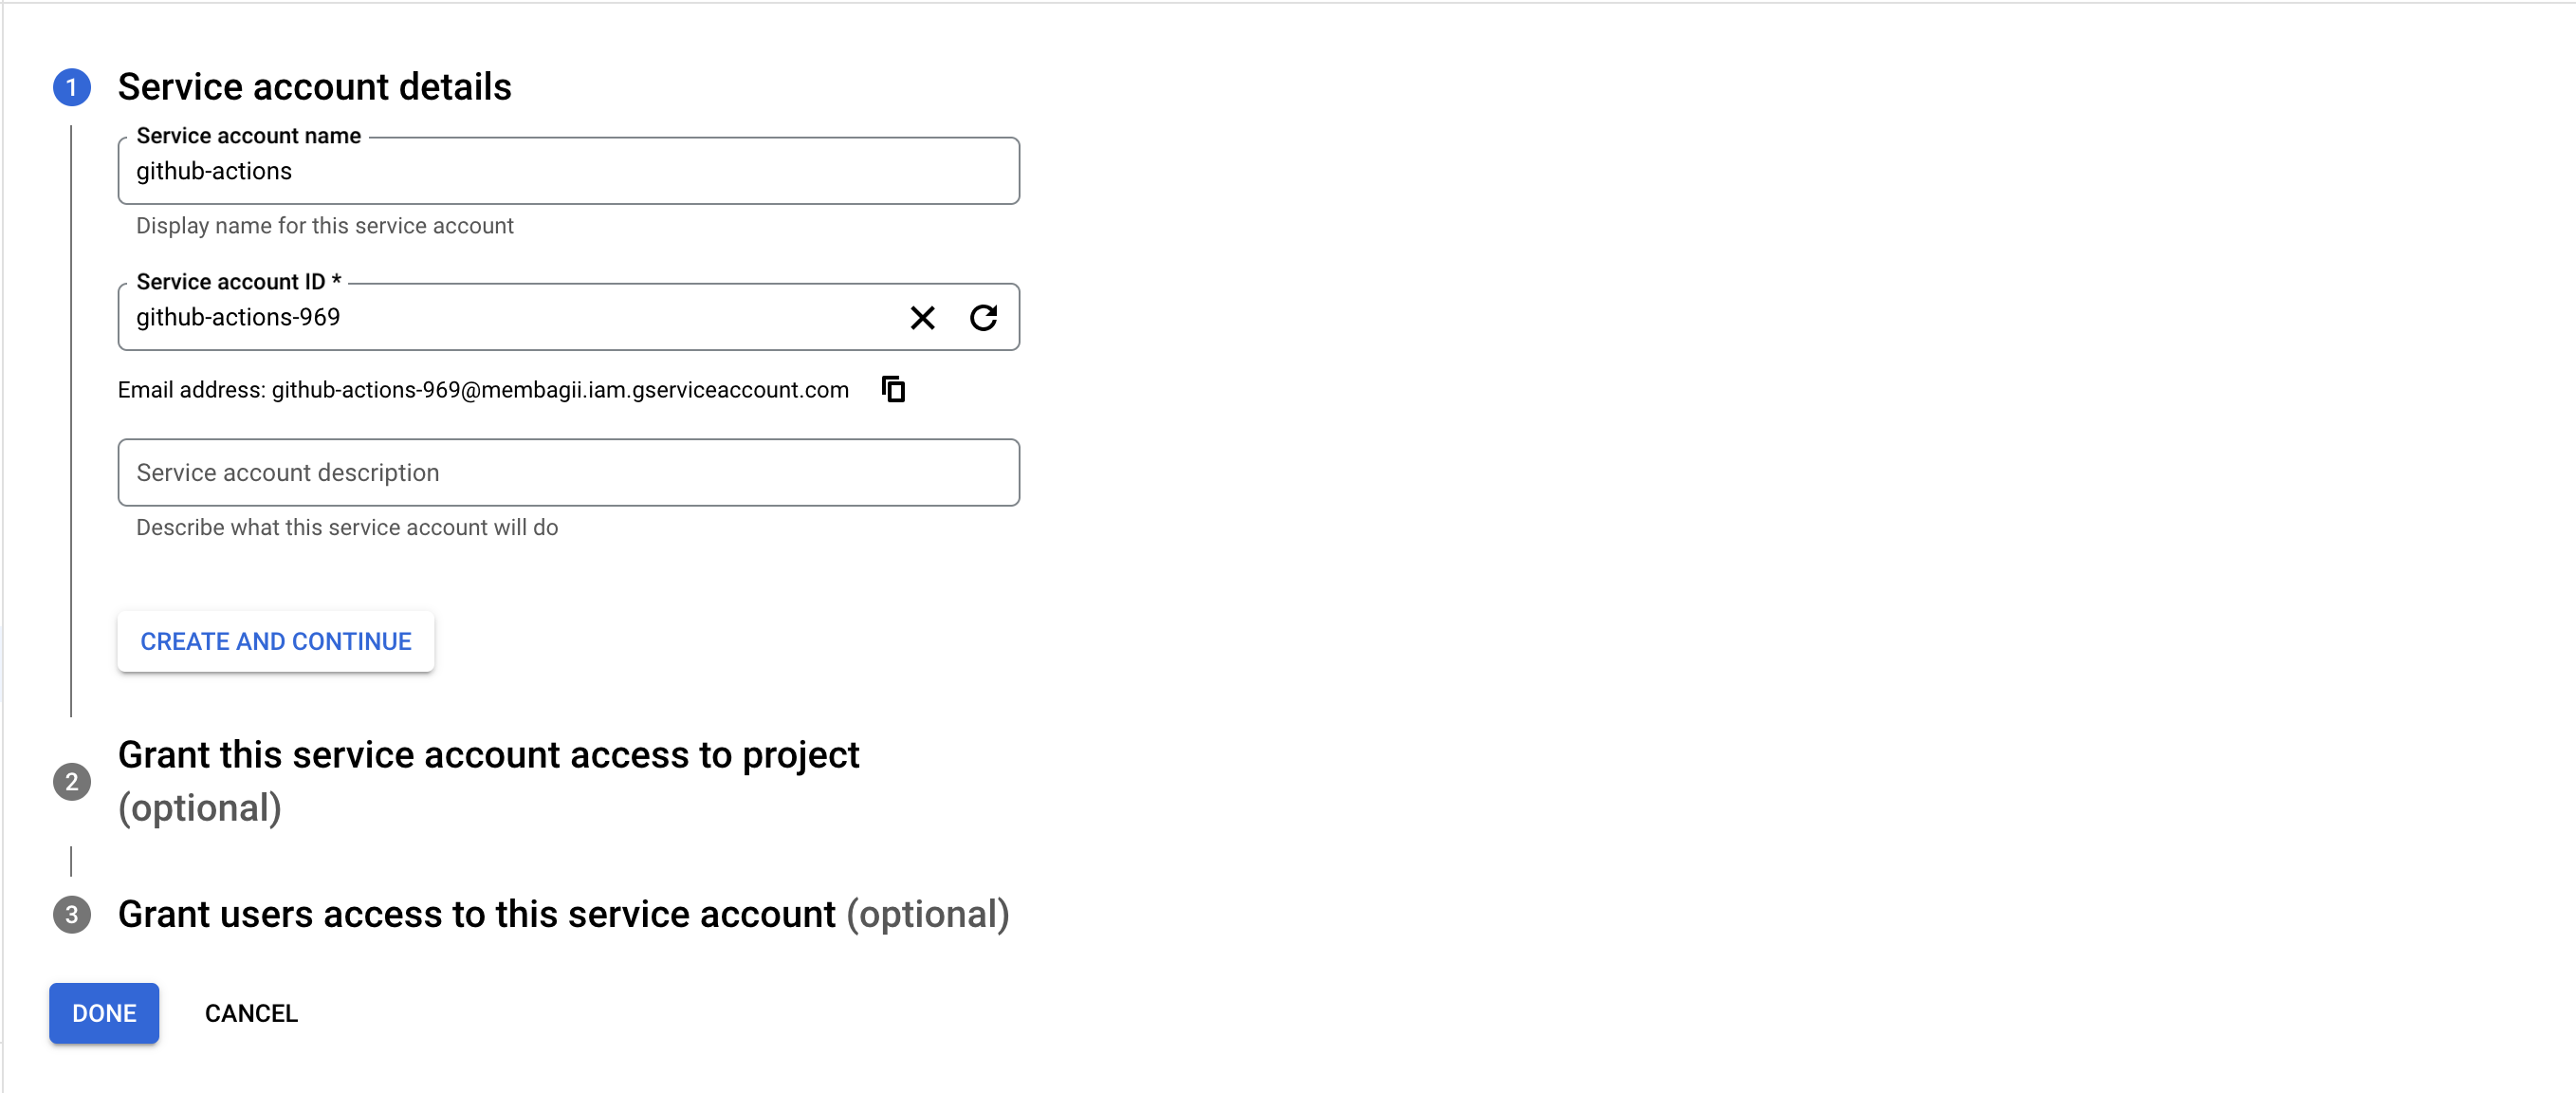
- Create a new service account in the Google Cloud console. You can do this by navigating to the IAM & admin section of the Google Cloud console and clicking on the "Create service account" button. Follow the prompts to create a new service account with the desired name and permissions.
- Grant the service account the necessary permissions to access the Artifact Registry. You can do this by navigating to the Artifact Registry section of the Google Cloud console and clicking on the "Add member" button. Follow the prompts to add the service account with the desired permissions.
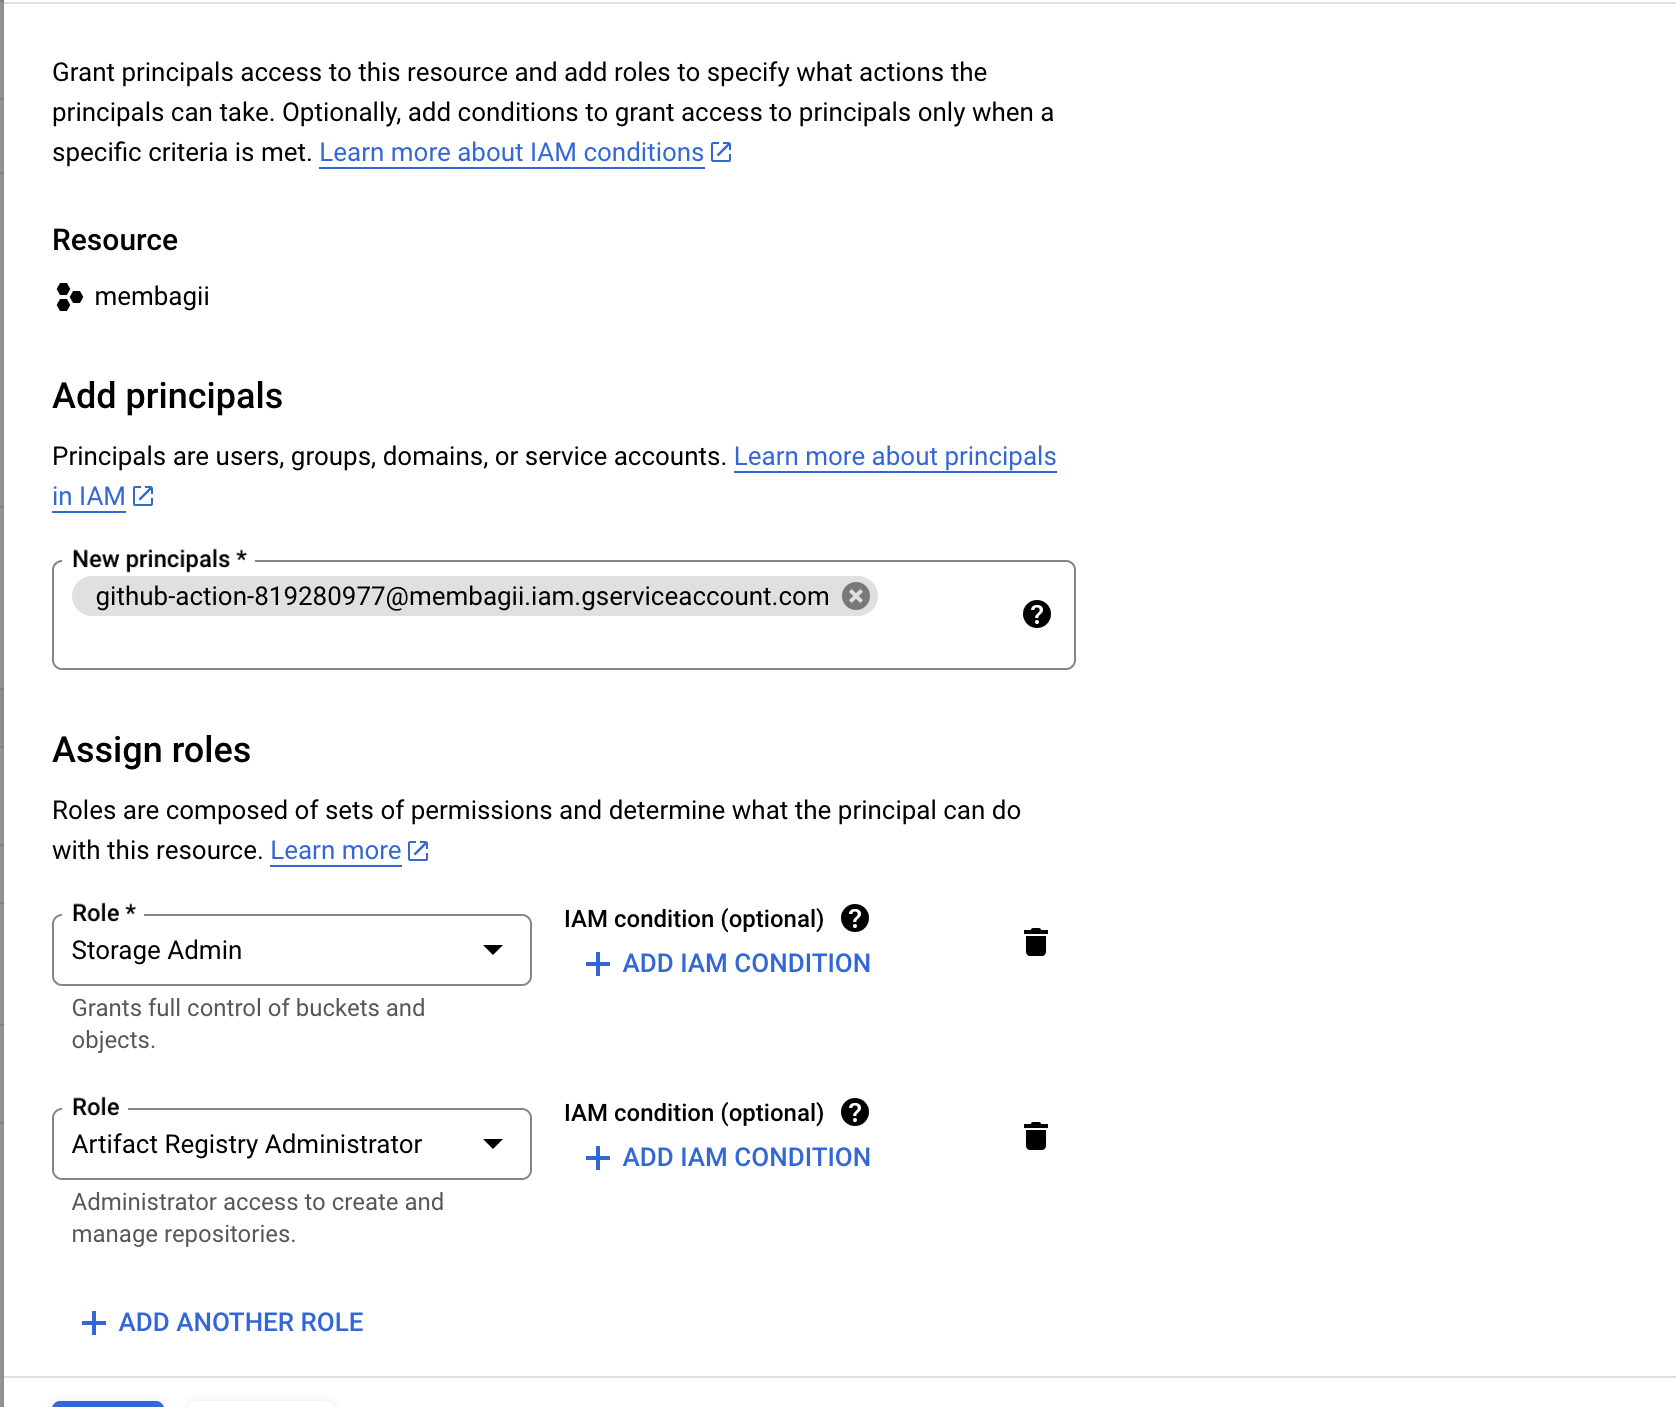
Grant Access IAM
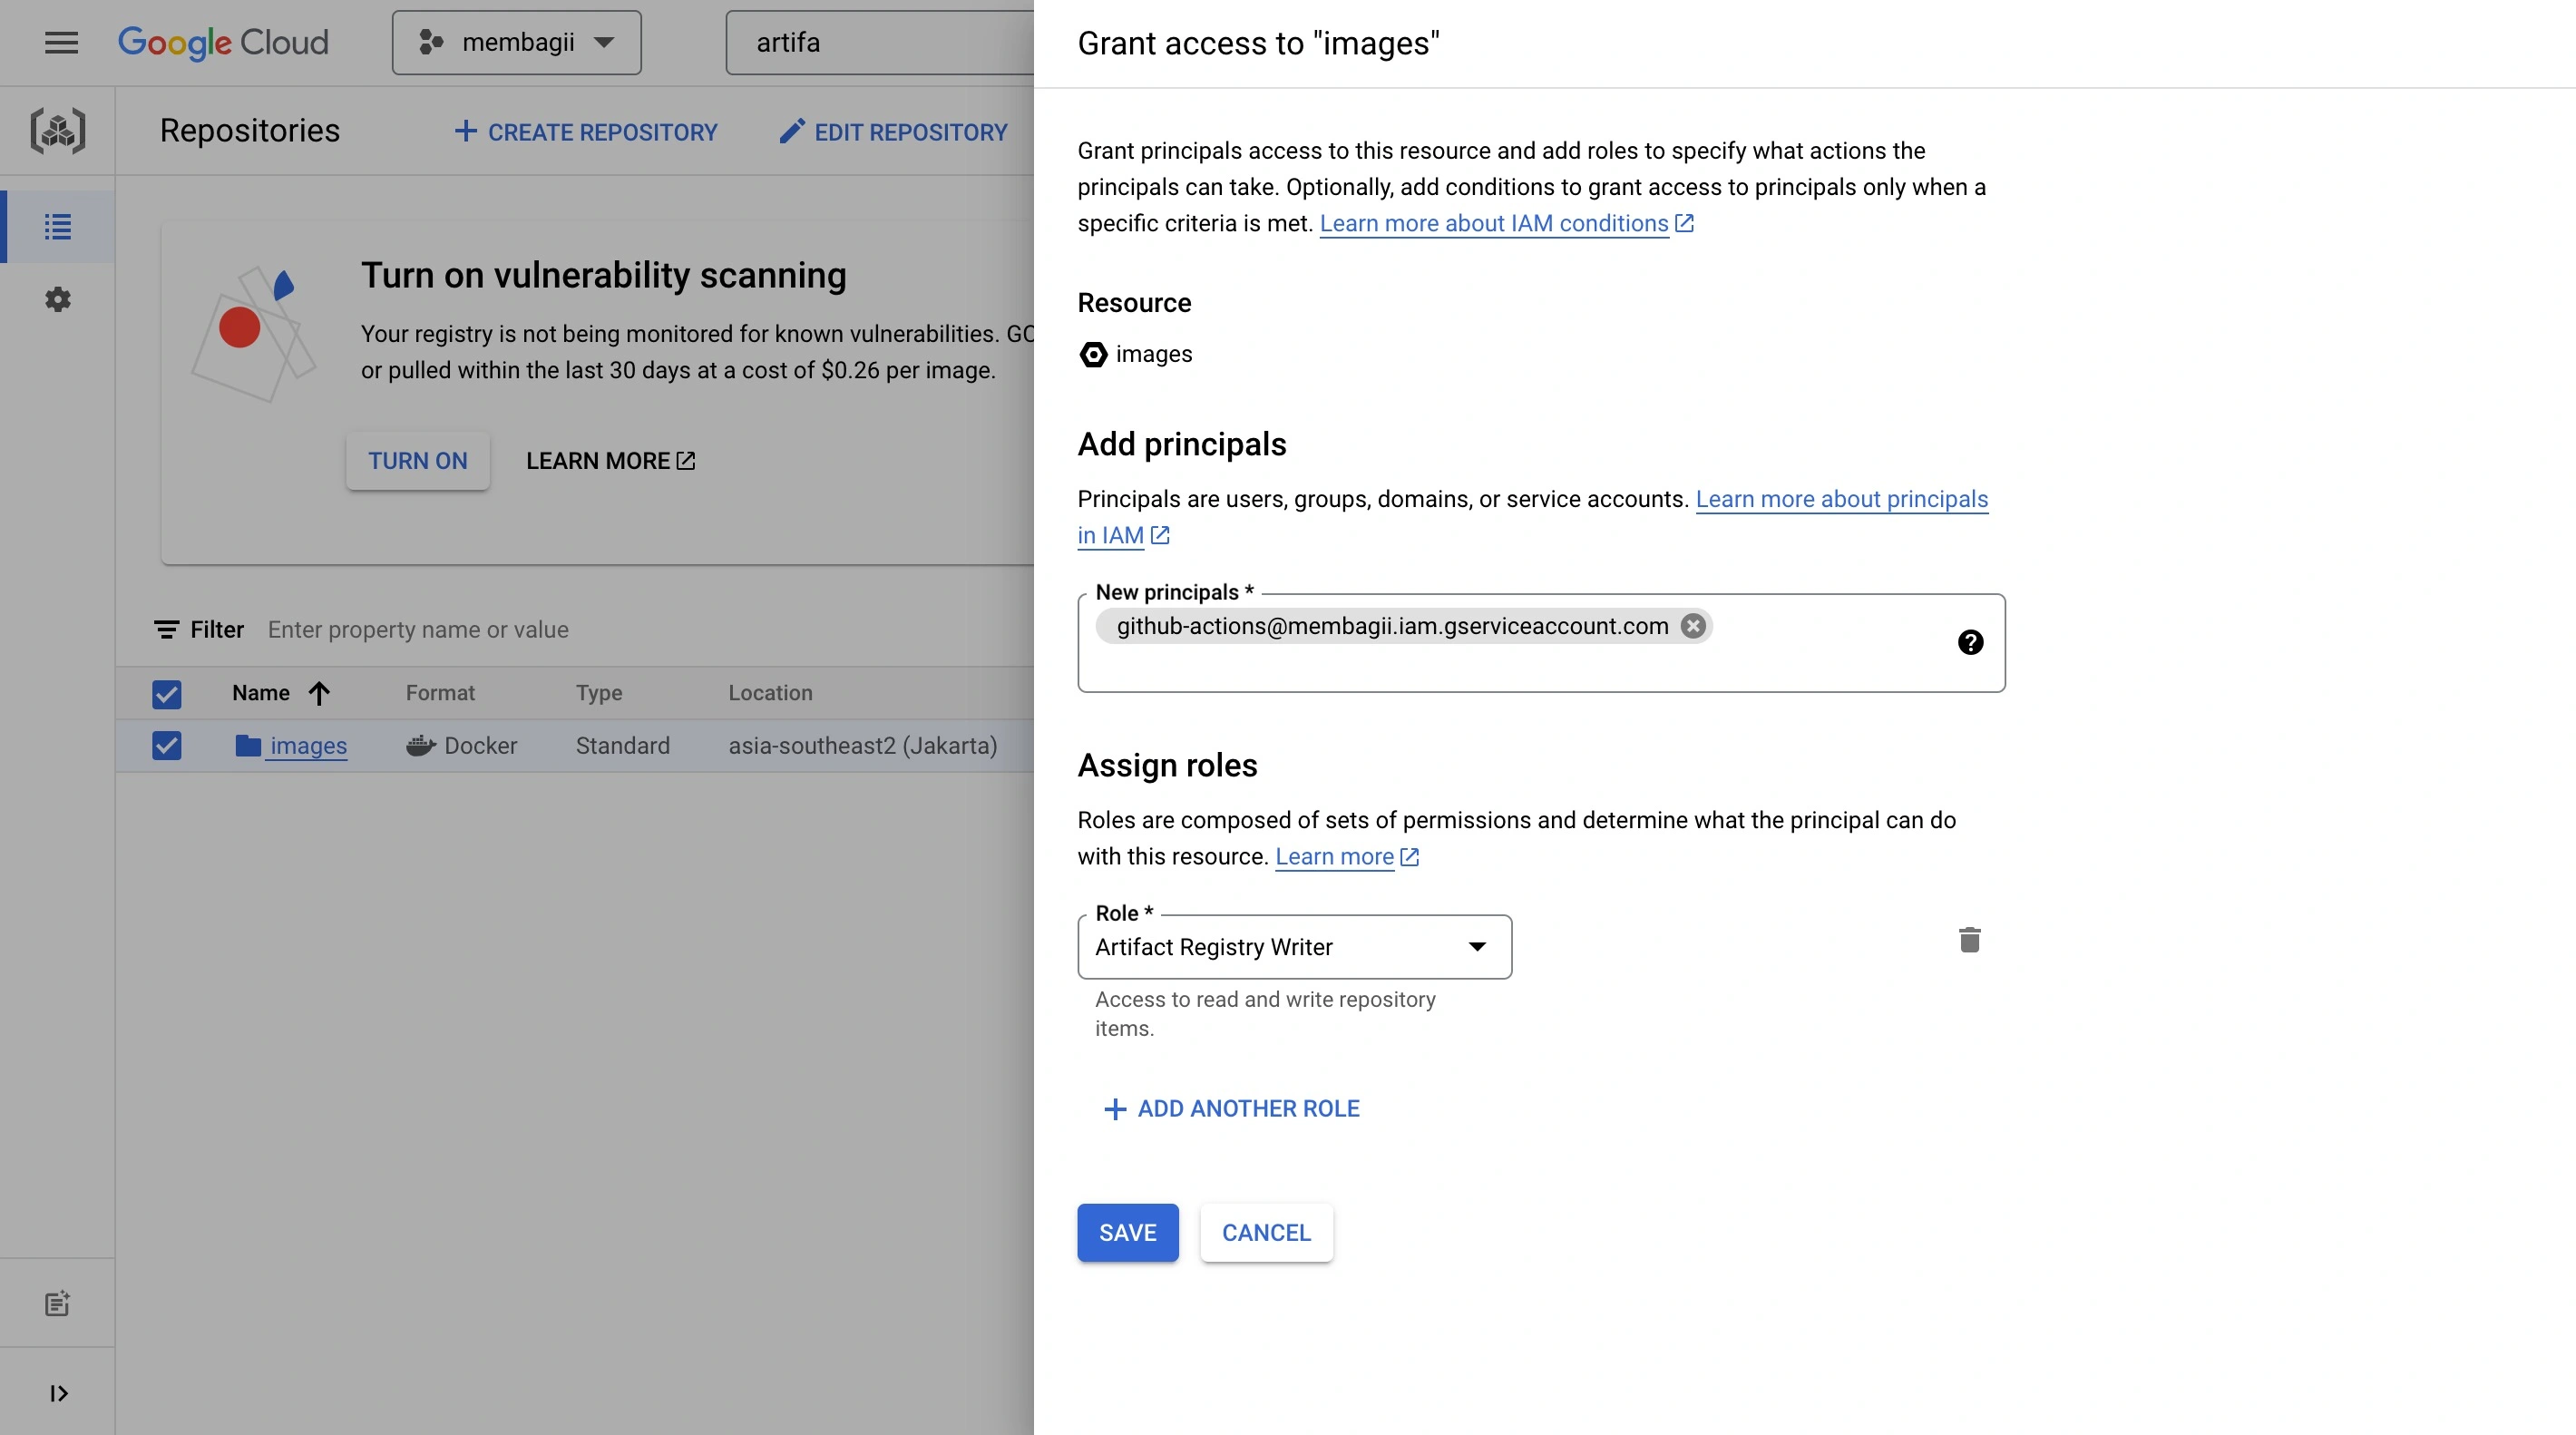
Grant Access Repository Artifact
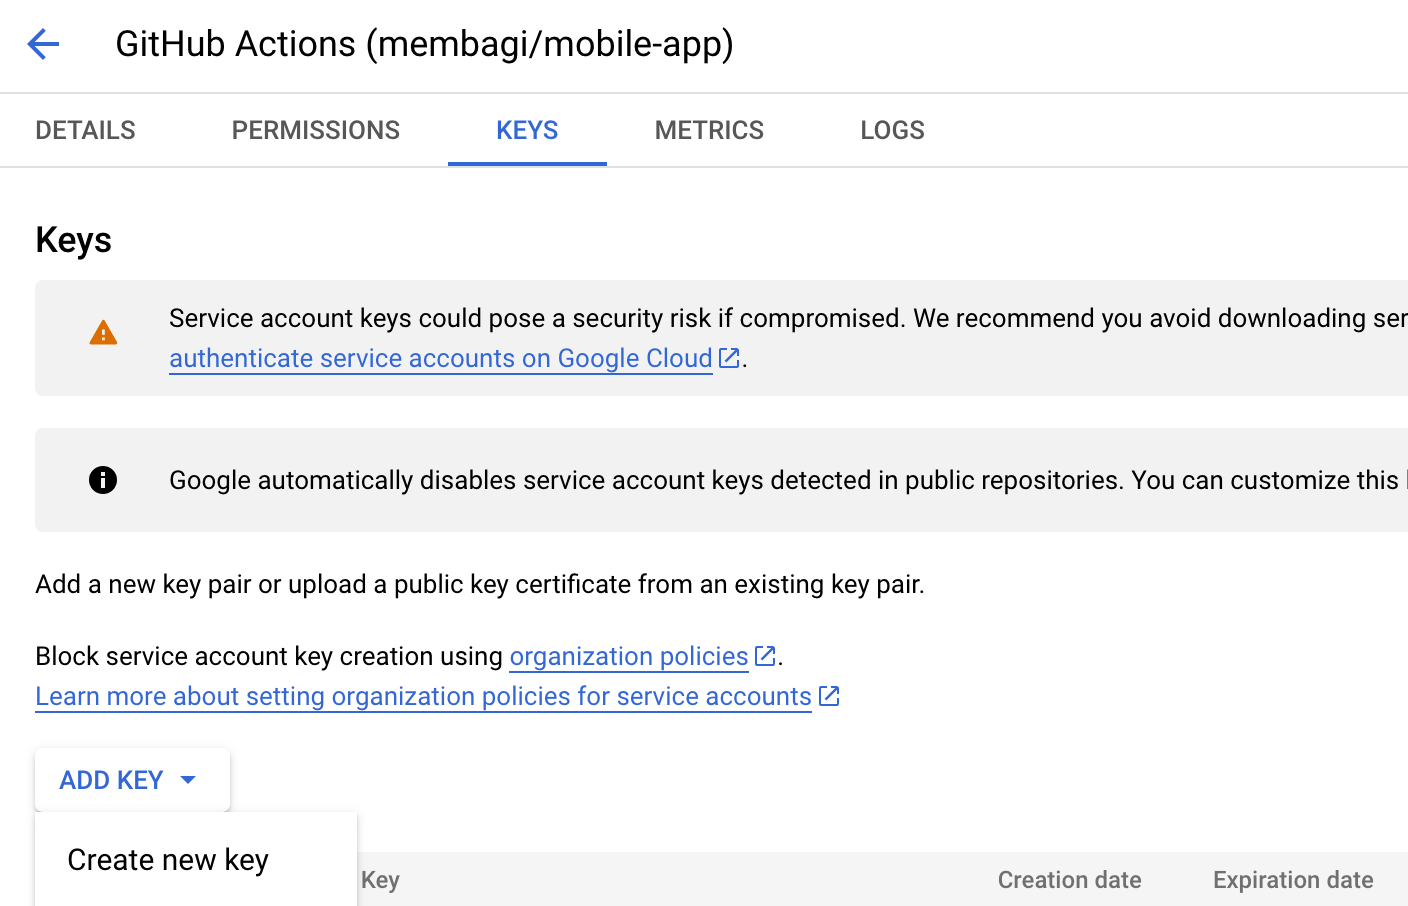
- Generate a JSON key file for the service account. You can do this by navigating to the service account section of the Google Cloud console and clicking on the "Keys" tab. Follow the prompts to generate a new JSON key file for the service account.
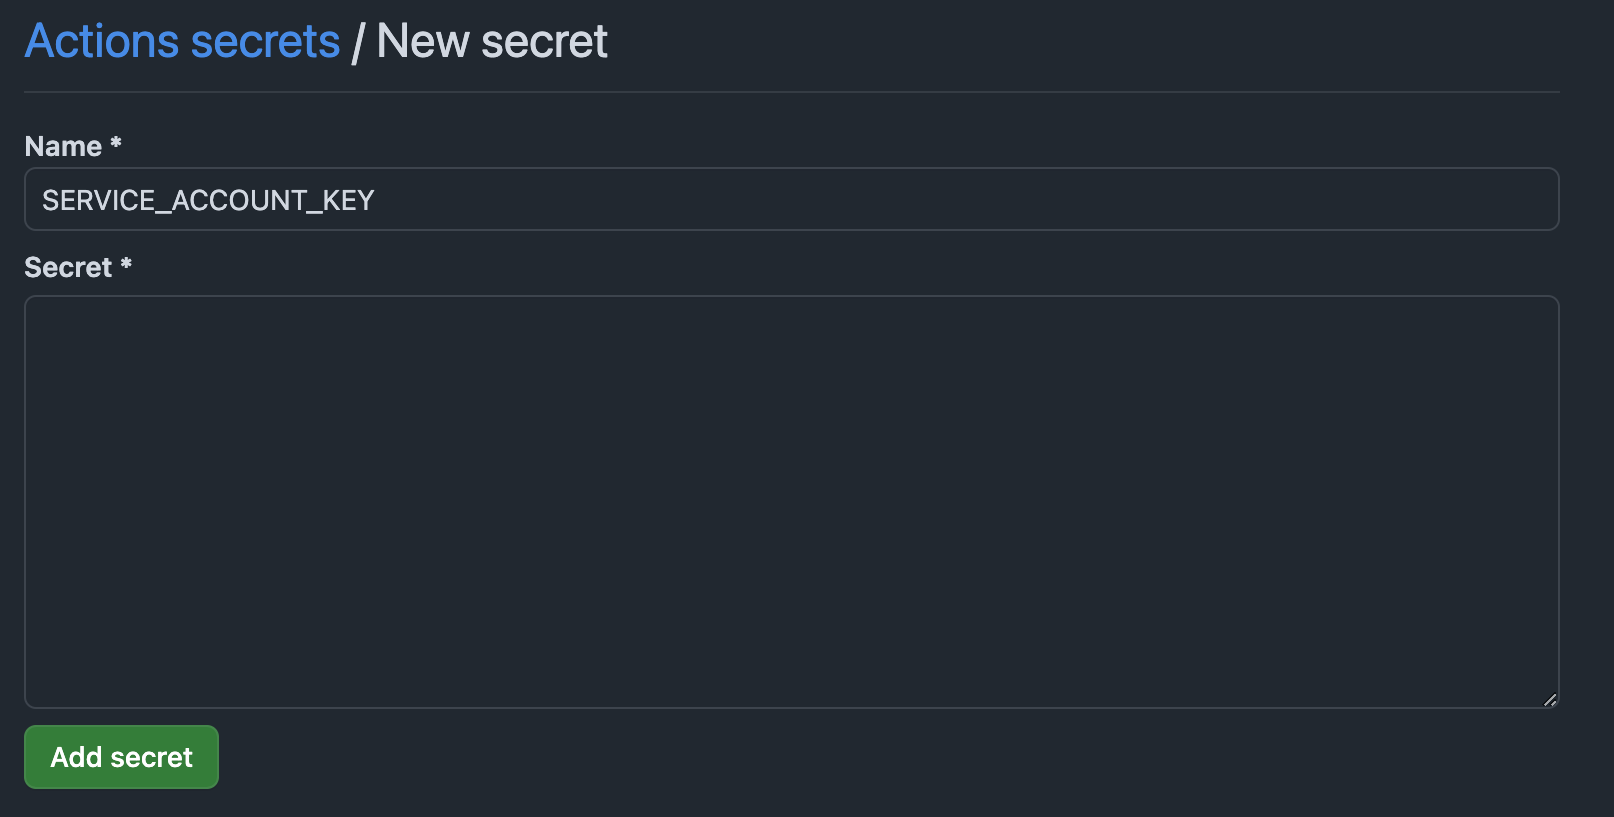
Once you have created the service account and generated the JSON key file, you can add the credentials to your GitHub repository. You can do this by navigating to the "Settings" tab of your repository in the GitHub website and clicking on the "Secrets" button. Follow the prompts to add the JSON key file as a secret with the name SERVICE_ACCOUNT_KEY.
Step 6: Securely manage authentication
To securely manage authentication, you can use GitHub Actions secrets. Secrets are encrypted environment variables that can be accessed by your workflow. You can do this by following these steps:
- Create a new secret in your GitHub repository. You can do this by navigating to the "Settings" tab of your repository in the GitHub website and clicking on the "Secrets" button. Follow the prompts to create a new secret with the desired name and value. In this case, we will use the JSON key file as the value.

- Add the secret to your workflow. You can do this by adding the following code to the
buildjob in your workflow:
- name: Google Cloud Platform Auth
uses: "google-github-actions/auth@v1"
with:
credentials_json: "${{ secrets.SERVICE_ACCOUNT_KEY }}"
- name: "Set up Cloud SDK"
uses: google-github-actions/setup-gcloud@v1
This will ensure that the JSON key file is securely stored and used in your workflow.
Conclusion
By following this guide, you have learned how to set up a CI/CD workflow using GitHub Actions to automate the build and deployment process and push artifacts to Google Artifact Registry. You have also learned how to integrate GitHub Actions with Google Cloud and securely manage authentication. This ensures a smooth deployment process, enabling efficient storage and retrieval of artifacts for your application.